DoReMi Piano

Announcing the launch of the brand new solfa piano method for young beginners based on the Kodály Approach.

DoReMi Piano Book 1 covers technique for the young beginner; pulse, rhythm and pitch understanding; simple pentatonic songs learn first as games and then on a simplified stave. By the end of Book 1 the student will also have an understanding of time signatures, bars, dynamics and slurs.

Why not check it out

http://doremipiano.co.uk

Gender Equality

heforsheI have been inspired this week to write about gender equality. A number of wonderful people have written blogs or given speeches in support of gender equality. I have decided to “man up”, stop “crying like a girl” and join the cause. After all, as Emma Watson said in her inspiring speech to the UN

“If not me, who? If not now, when?”

So why me? And why now?

I see boys singing and loving it. I see 4 year old girls laughing at them because boys shouldn’t sing.

I see girls playing football on the school team. I see schools telling those girls they can’t play for the team this week because a tournament is boys only.

I see sexist books that try to tell us how to raise boys or raise girls, that contain opinions debunked by modern neuroscience and psychology (Read Cordelia Fine instead!)

I see toy shops and book publishers colour coding toys. Putting arts and crafts in the pink section and science and construction in the blue section. Sorry girls, no science for you. And who’s ever heard of a male artist? Ermm…

Even books about inspiring women annoy me. Why can’t we show that strong women are normal and widespread, not special and super-strong.

I could go on and on and on!

So what’s this got to do with my teaching? What’s it got to do with music?

Every day, every member of our society has a responsibility to educate our boys and girls. We all must try and eliminate gender inequality. It’s all about the small stuff.

It’s the assumption that a girl will prefer a beautiful romantic expressive song or piece over a loud and driven boogie woogie. It’s the assumption that a boy who may be losing interest in their music lessons needs a fun, fast student saver that’s “good for boys” and won’t respond to something soft and expressive.

It’s realising that when you illustrate a music book, or any book, with pictures of girls having picnics or boys playing football that will have an impact on your students. They will notice, they will care and it will affect which music they think they are supposed to like. It will also affect their view of those activities.

Diane Hidy has written a brilliant blog about cover art, titles and lyrics in piano books. http://dianehidy.com/teaching-tips/2014/9/18music-has-no-gender

Inspired by the passionately written blog by Carly McDonald about “music for boys” http://creativepianoprofessional.com/2014/09/10/7-reasons-why-there-is-no-such-thing-as-music-for-boys/

Toys are for everyone. Books are for everyone. Colours are for everyone. Feelings and emotions are for everyone. Strengths and weaknesses are for everyone. Jobs are for everyone. Love is for everyone. Courage is for everyone. Fear is for everyone.

Music is for everyone.

So this is me, standing up right now in support of Emma, Diane and Carly. In support of any man or woman who also feels they want to improve gender equality. Let’s do this!

Solfa Challenge Level 3

Once my students have achieved the Solfa Challenge Level 2 they should be able to perform a collection of simple songs and rhymes, show the pulse and shape of the pitch and also record these two things in a fairly rough and ready way. In Level 3 we will expand on this and start to introduce the concept of quavers. Again, my ideas have come directly or been inspired by Cyrilla Rowsell and David Vinden’s Jolly Music.

Level 3 is split into three sections as you can see from the Solfa Challenge – Level 3 Chart

Section 1 – I can play…

I can play Patacake

I have mentioned before that some students will tap the rhythm instead of the pulse, or some hybrid of the two. I have found playing patacake can help with this. It gives a very visual and kinesthetic guide from the teacher. My own youngest son still manages to patacake the rhythm though, and gets very cross with me when I’m not in sync with him. Still, he is only 5 so there’s time.

I can play the Radio Game

This game is fabulous. Basically you have one person as the radio controller and the others as the singers. You agree on a signal (like opening and closing the hand) for the controller to tell the singers whether the radio is ON or OFF. The singers must sing the song while the radio is on and then be silent when the radio is off. Initially you may want to sing most of the song ON and just turn it OFF for the last line or few words. The tricky bit is when you turn it off and on again in the same song. The singers must continue the song in their thinking voices (silently in their heads) and start singing again at the right place. Some students will start again on the next word as if a CD has been paused, not a radio being muted.

It’s such a brilliant way of practising keeping a steady beat and working on the thinking voice.

I can play Pass The Song

I love this game and my Infant School Choir love playing it too. Basically you split into groups. In a piano lesson it might be just the teacher and the student. Without missing a beat you must perform a song, taking it in turns to sing. Start easy and sing the entire song before passing. Then try singing a phrase each, and finally a beat each. Some students will have trouble with the beat option. They will try and sing a word each. They could use their pulse pictures they will create in Section 3 below, and tap along the hearts with their fingers to help.

Section 2 – I can play on the keys

For each of the four songs we have been working with, the student plays them by ear on the black keys. You can show them how to find the right black keys for so and mi by showing them the “gaps” on the keyboard. Once they can do that confidently they can extend it to white keys starting on C, D or G. Moving to different keys not only demonstrates that songs can be sung in different keys (transposed) and also encourages them to use their ears to find that second lower pitch. Although I have had students who realised they could just count the semitones – which I guess is another useful skill!

It is vital that the students are comfortable singing the songs accurately and that they understand that the songs use two pitches. A high pitch and a low pitch. They need to build on the work they have done mapping the pitch with their hands and on paper to play them accurately on the piano. Many will just alternate pitches on each word instead of each beat (which is the case for these songs but not future ones) so coming off the bench and doing regular revision of the up and down arm movements will be required. Slowly and surely is the way to go.

I personally don’t demonstrate this activity to the student, rather I talk them through it and sing a lot to get them to their goal. If I demonstrate it, they pick it up much faster but I’m not sure that it provides the same learning opportunities.

Section 3 – I can record

Pulse This starts off very similar to Level 2. We are showing the pulse on paper but this time by writing the words in a set of 8 hearts rather than gluing and sticking. I use a technique I learned from Jolly Music.

1 – The student and teacher sing the song
2 – The student and teacher sing the song and tap the pulse on the hearts
3 – Hopefully the student can now do this on their own
4 – The student taps the hearts and sings in their thinking voice
5 – The teacher taps and the student sings in their thinking voice but the teacher stops on a heart and the student must write the word in the heart
6 – Keep going until all the hearts are full

Make sure you start by filling in all the hearts containing only one word first, then it is easier to fill in the others. If a student keeps getting it wrong you might ask them to sing aloud so you can hear where it’s going wrong. It will probably be that they are singing a single word for each beat rather then keeping with the rhythm they have learnt.

If they have filled all the hearts and missed off a word in the middle – quite a common error – you can sing their song back to them as they have notated it and see if they realise there is a word missing. Another trick is to stop with one heart to go, talk about how many words we still have to fit in, and they should realise that the final heart needs two words, not one.

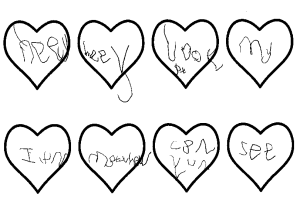
Here is a pulse picture by Matthew (age 5). He changed the words to Hey hey look at me. I am Matthew can you see.

Solfa Level 3 Example 1

Rhythm Using the same heart beats from the pulse section we can take a look at how many sounds are in each beat. Sometimes there is one sound and sometimes there are two. I start with See Saw as there are only one syllable words to deal with. Cobbler Cobbler can require a little more explanation since Cobbler has two syllables and therefore two sounds.

Next we need to show how we can tap the way the words go, rather than the pulse. So we might have to tap a heart twice if there are two sounds. Hopefully they will know the song well enough to time the taps correctly. When I have done this with older students without the proper preparation we have had some very uneven taps.

Finally we can make crosses underneath the hearts to show which hearts have one and which have two. A confident student may wish to try adding the crosses in the hearts without the stepping stone of the words.

Now we can tap the pulse by tapping the hearts or tap the rhythm (the way the words go) by tapping the crosses. The student can see, hear and feel the difference between pulse and rhythm. An important milestone.

To be continued…

Solfa Challenge Level 2 – Part 2

Here is Part 2 of my guide to my Solfa Challenge Level 2.

Here is a link to Part 1

Level 2 is split into three sections as you can see from the Solfa Challenge – Level 2 Chart. In Part 1 we discussed Sections 1 and 2, I can play and I can show. Here I will describe Section 3 – I can record.

Section 3 – I can record…

We have established in Section 2 that the student can show the pulse and the shape of the pitch with their bodies. Here I ask them to record this. I don’t expect the students to use standard notation at this point. Although many may well be able to.

Instead it’s all about stickers and glue!!

For the pulse I give them a print out of the lyrics (although we can also do this on a white board or hand write it). They then stick a sticker (or make a mark) on the lyrics where the pulse occurs. We work this out by tapping the lyrics with our finger in time with the pulse and work out which word or syllable aligns with the pulse.

For the pitch, this time their lyric sheet is cut up into pulses. We draw a line across a piece of paper and the words or word pairs are glued on the page, either above the line, or below. You can see for both these activities how vital it is for the student to have a clear grasp of the music from Section 2 before attempting these.

Better than explaining any further, here are some examples of pieces some of my students have done. They are all from quite young children, as my adults and older students do similar activities with whiteboards instead.

5 year old boy

Here is the first attempt at pulse recording from a willful 5 year old boy. In the first example he has made some errors, in the second he insisted each beat get two stickers. Then he personalised his chart with his own imagination. For information, those are pig-trains (don’t ask me!) and each beat is a carriage. Ok so accuracy is missing but he certainly enjoyed the activity and there was certainly plenty of singing!
Solfa Level 2 Example 1

A couple of weeks later, having abandoned the stickers and sticking with the pig-train theme, he produced this. Completely accurate (except that apparently pig-trains have legs). Success!Solfa Level 2 Example 2


7 year old boy

This child is far more serious, he didn’t want to use stickers and instead drew hearts to represent the heart beats of the pulse. You can see where he initially positioned the hearts. We talked about an alien coming down to earth who doesn’t know the song. How will he know where to bang the drum, or clap or time the words? I performed the song the way he had notated it (quite a challenge!) and he immediately grabbed it off me and redid his hearts.
Solfa Level 2 Example 3

Here is this boy’s pitch picture. You can see he put 5 beats on line 1 and 3 on line 2. This gave us an opportunity to talk about phrasing. And again, we did loads of singing!Solfa Level 2 Example 4


Do you have some cute student solfa pictures? Perhaps you could send them to me and I’ll start a gallery! 😀

Here is my guide to Level 3

Piano Practice Sheets

I have been asked by a couple of people to share the assignment sheets I give to my students. I change my sheets on a regular basis. I like to think it’s to make improvements and that one day I’ll have the perfect system. However, it’s more likely that a change is as good as a rest – for me and my students. I find each time I make a change my students pay more attention to what I write as it feels like a novelty.

Here is my main practice sheet.

Piano Practice Sheets

It is split into four week blocks and each week has a section for pieces, scales and theory, general comments and communication from parents. I use post it notes on the piece itself for more details and targets. There’s also a practice tick box. This tick box often gets ignored though, after the initial enthusiasm has waned. While I don’t want practice to be seen as a box ticking exercise it’s quite helpful to show students and parents that perhaps daily practice might be desirable!?

Perfect Pieces

Over the summer I have developed a new sheet for pieces, to be used in addition to the practice sheet. I designed it for my own son. He’s 7 and is currently working towards his Trinity Initial exam. Students at this level have quite a few pieces on the go at once and it’s hard for them to remember to practice the ones we may not have covered in that week’s lesson.

Perfect Pieces Chart Level 2

I am planning to create a Level 1 version of this sheet for my lower level students. My dilemma with this chart is that it looks like dynamics and articulation are added at the end, when in fact I prefer them to be included from the beginning. However, in the journey to perfection (whatever that is) the accurate delivery of the dynamics and articulation are often the final parts to be perfected. Certainly at this level in my experience.

The trouble with these catch all sheets is that every student is different and every piece is different. It would be nice to create a different template for all the different scenarios but in the meantime this is what I have! It’s not made of stone after all!

I hope you find them useful.

Solfa Challenge Level 2 – Part 1

Once my students have achieved the Solfa Challenge Level 1 they should be able to perform a collection of simple songs and rhymes. In Level 2 we will start to do more interesting things with these pieces. Here is Part 1 of my guide to Level 2.

Level 2 is split into three sections as you can see from the Solfa Challenge – Level 2 Chart

Section 1 – I can play…

I can play Stand Up Sit Down

This is where the games come in. We play the ever popular Stand Up, Sit Down game from Cyrilla Rowsell and David Vinden’s Jolly Music. The game starts simply and becomes more complex as the student becomes more competent with their pitch awareness. The teacher sings either “stand up” or “sit down, and the student must stand up or sit down! Easy right? The pitches sung either rise from so to do’ (dominant to high tonic or G to high C) for “stand up” and descend from so to do (dominant to low tonic or G to middle C) for “sit down”. The teacher starts each instruction with their hands in the ready position by their chest and either moves them up to their head or down to their waist with the direction of the pitch. You can try and trick the student by singing “stand up” when they are already standing up! They think this is hilarious – if they notice!! For those who don’t notice I put a mischievous grin on my face before I do it to give them some warning.

The benefits of this game are to associate up and down with the different pitches. The children are hearing the pitch change, seeing the arms move, physically responding with their whole bodies and also hearing the instructions.

For the second stage of this game the teacher replaces the lyrics with a “doo” sound. So the children no longer hear the instructions but they still see the arms move and hopefully have started recognising the pitch. My mischievous face is used a bit more here.

Finally we remove the arm movements and the children rely purely on their pitch awareness. If anyone is struggling I might use my face to give them clues until they can do it comfortably.

The children love this game and I am definitely the first to get bored! They especially love being the teacher and it can sometimes be quite a challenge to do what they’re expecting. I want to build their confidence but in the early days with some of the students their pitch can be all over the place. Luckily they think it’s hilarious when I get it wrong!!

I can play Guess the Pitch

The second game can be sung or done on the piano. It’s Guess the Pitch. They don’t have to identify the actual pitch – that would be far too challenging at this level. They just need to identify if the pitch is high or low. Sometimes it’s easier for them to hear it sung, sometimes having the massive extremes of the piano is more helpful. As always the key is to make it really obvious to start with and only move to smaller intervals with the most confident. The aim of the game is to get them to label high pitches as high and low pitches as low.

When I started teaching I was surprised how many students had an issue with this concept. Even one of my most musical 5 year olds had it completely the wrong way round. When I corrected her, she thought I was joking and laughed herself silly! So if a student struggles I give lots of extra verbal clues like “Is this sound high like a tweeting bird or low like a grizzly bear?” Gradually those verbal clues can be removed. Now I’m not surprised, why would a student associate high frequency vibrations with high in the sky and low frequency vibrations with low down? It’s only a shared label, the words don’t actually mean the same! Then we expect them to realise that high in the sky equates to the right of the piano and low is the left – and this is before we even get onto notation! If we need to spend more time on this task then it’s time well spent.

Section 2 – I Can Show…

For this section we use some of the two note so-mi songs we learnt in Level 1. The songs have been taken from Cyrilla Rowsell and David Vinden’s Jolly Music. For each song the student must show the pulse and then the shape of the pitch with their bodies.

I can show the pulse

For Pulse I usually start with Cobbler Cobbler. The students are really familiar with this one as we will have been clapping, tapping and marching the pulse from lesson 1 or 2. They achieve their sticker if they can mark the pulse without help and with a steady beat. The biggest hurdle for this task is stopping the student from tapping the rhythm. Cobbler Cobbler is a good starter because it starts with quavers, where the pulse is crotchets. So if you get them started with a good crotchet pulse then they are more likely to succeed. Contrast that with See Saw or Hey Hey (which we also do at this level) which start with crotchets and then have quavers a couple of words in. With these songs the students may start of tapping the crotchet beat but on the quavers they may tap each quaver – which is actually the rhythm.

Marching is a good way of eliminating this, it’s easier to march the pulse than the rhythm. Also patacake can help them get a good sense of pulse. My own youngest son still manages to patacake the rhythm though, and gets very cross with me when I’m not in sync with him. Still, he is only 5 so there’s time.

I can show the pitch

To show the pitch I just mean to raise or lower the arms as the pitch raises and lowers. Just like we did in Stand Up Sit Down. The teacher should show the pitch with the students initially, until they are ready to do it alone. Ideally to achieve their sticker they should be able to perform it alone, accurately and at a lesson where you haven’t already practised together.

For this I start with Up and Down because the first two pitches are labelled within the lyrics. The pitch of all these two pitch so-mi songs swaps on the beat so the arms will be moving with the beat as well as with the pitch change. To help the students you can sing the song first and work out together if the song starts on a high pitch or low pitch. For this set of songs, they always start on the high pitch. It is important to start with the hands in a neutral “ready position” around chest height. If the students start with their hands high, in anticipation of the first pitch, then they may invert the whole melody!

Section 3 – I can record…

to be continued in Part 2

Solfa Challenge Level 1

I would like to introduce the first level of my Solfa Challenge.

All of my pre-Grade 1 students are working on one of the Solfa Challenge Levels.

As a piano teacher I love the Piano Adventures Method. It starts off-stave on black keys, eventually moving to the white keys but remaining off-stave.  It gives a marvelous introduction to the exploration of pitch. It helps the students develop an understanding for how the keyboard and position on the page relate to the aural feedback.  Of course this can be done on-stave too but the stave is an unnecessary complexity at this stage. I would rather nurture their musicianship than their note reading.

Cyrilla Rowsell and David Vinden’s Jolly Music is a comprehensive classroom scheme for teaching singing and musicianship using the Kodaly Approach. As members of the British Kodaly Academy, they advocate singing to develop musicianship in adults and children, in musicians and total beginners.

The Kodaly Approach fits neatly with the off-stave Piano Adventures Method. I don’t tally my Kodaly activities directly with the pieces in the Piano Adventures books, rather they run alongside. However there are certain milestones where they intersect.

Solfa Challenge Level 1

The objectives of Level 1 are to introduce the children to the rhymes and songs that we will use in levels 2, 3 and 4. They will already know a rhyme and a song, as I introduce these during the first couple of lessons. I have written detailed posts on these songs already and you can find them here: Cobbler Cobbler and Slowly Slowly.

However in addition to these there are a few more rhymes

Soft Kitten Warm Kitten
Coca Cola Went To Town
Chop Chop Choppity Chop

The first objective of these rhymes at this level is to enable to children to feel the steady beat or pulse of the rhyme. We will perform the rhymes while clapping, tapping, marching etc. All the ideas from the Cobbler Cobbler blog. In addition Soft Kitten Warm Kitten in partnership with Chop Chop can be used to introduce the concept of dynamics – loud and soft.

There are also some songs

See Saw Up and Down
Hey Hey Look At Me
Up and Down
Cuckoo Where Are You?

All of these songs use just two notes a minor third apart. In solfa these are called so and mi. On a piano you could use G and E, F and D or D and B. Or indeed any of the adjacent black keys with the wider gap. However the easiest way of identifying the two pitches is to think of the playground taunt “ner ner ne ner ner”. Every child and adult will recognise that! It’s the easiest interval to pitch and is a perfect introduction for children to sing. Make sure you find a key that sits in their comfort zone. I usually take a guess around G and E, but then listen carefully and alter to suit if necessary.

To pass Level 1 the children just need to demonstrate that they know the songs and can perform them steadily – ideally from memory. I give them my Solfa Challenge – Level 1 Chart (this copy has had the lyrics obscured for copyright reasons) and they earn stickers to place in each circle as they have learnt each song or rhyme.

Once they are confident then we can move onto Level 2 where they have more pulse and pitch activities with each song or rhyme.

Here is part one of my guide to Level 2

Teaching syncopation – Five Little Speckled Frogs

In the Piano Adventures Level One lesson book is the great American standard L’il Liza Jane. It contains the classic syncopated rhythm syncopa. This is usually written as quaver crotchet quaver but since the Level 1 books haven’t yet introduced quavers, it’s written as crotchet minim crotchet.

I love this rhythm and it crops up again and again so I want to teach it effectively. I believe it’s important to experience the rhythm first, before showing students how it is notated. I suspect the Piano Adventures authors feel the same way. I suspect that every child in America is extremely familiar with this song. However, in the UK, not so much!

So my hunt began. I needed a song that UK children know really well, that also contains the same rhythmic motif. Then I remembered Five Little Speckled Frogs.

This song is perfect. Most young children know it, as they sing it regularly at playgroups, nurseries and early years music classes. For those who don’t know it, it’s also a counting song (we lose a frog each verse until there are no little speckled frogs left!). The benefits of this type of song are that we get 5 repeats without the children losing interest. So any children not totally certain before, certainly will be after they’ve counted down from five to none! Another benefit is that each of the six lines starts with the syncopa rhythm!

So how to teach it?

1 – Sing it! Sing it to the student with one hand showing the five frogs, sitting on your other hand, which is the log! Here are the lyrics to jog your memory.

Five little speckled frogs
Sat on a speckled log
Eating some most delicious grubs, yum yum
One jumped into the pool
Where it was nice and cool
Then there were four green speckled frogs, glub glub
Four little speckled frogs etc…

Or you can hear it here

2 – Hopefully the student has joined in at some point during the song. If not, ask them to sing it with you or on their own if they seem confident.

3 – Ask them to focus on the first line. Can they clap the rhythm of the first line? Perhaps with you if necessary. Talk about the first half being quite jazzy and we call it syncopa.

4 – Next I will move off the bench and sit on the carpet if available. I pull out four flashcards with a variety of rhythms, including syncopa of course! Can they clap the rhythms? Allow them to choose which ones to clap. They will invariably leave syncopa until last, as it is least familiar. Can they identify which if the rhythms matches the jazzy start to the song? To download the flash cards click Rhythm Flash Cards – Syncopa.

5 – We can then have some fun choosing which two flashcards makes the rhythm from the first line. We can clap it, we can sing it, we can tap it, we can speak it with syncopa ta ta ta-a. As many different ways as possible to map the rhythm experience of the song with the visual representation.

6 – Depending on the maturity of the student I might now explain the term syncopation and how it describes a rhythm where the emphasis is on the off beat. I take the flash card with four crotchets and discuss which of the four beats are strong and which are weaker. Then we place it above each of the other three flash cards and decide which of them are syncopated. Only syncopa of course!

7 – Next I bring out the score for Five Little Speckled Frogs. I’ve written it in a very simple way. Two handed, five finger position with no hand movements, melody only. Students at Level 1 of Piano Adventures should have no trouble with the pitch recognition so all of their concentration can focus on the rhythm. Hopefully with all this preparation they will be able to play it quite easily.

8 – Finally, out comes the Piano Adventures book and they can find the syncopa rhythm in L’il Liza Jane. You can put the syncopa flash card up on the music stand for them to match if they are having trouble.

With careful practice (which I know all our students do!) they should be able to learn L’il Liza Jane fairly independently.

Here is my arranged score for Five Little Speckled Frogs. You are welcome to use it for your own students.

Five Little Speckled Frogs


Scale or Broken Chord Worksheet

Just a quick post to share a worksheet I have just created for my piano beginners. The aim is to give them practise identifying patterns in the music. If they are skilled at identifying scale or broken chord patterns, they will find them quickly in their repertoire.

Depending on the level of the student you can ask them to identify which scale or broken chord it is, and then see if they can play it! (They are all C, F or G major and don’t use ledger lines apart from Middle C – oh except I sneaked a D minor in at the end to see if they’re on the ball!)

Scales Broken Chords Worksheet

Musicianship – Slowly Slowly

I sing Jolly Music songs with my students from their very first piano lesson. We start with Cobbler Cobbler, which is excellent to help them understand pulse and subsequently crotchets (quarter notes).

Working through Unit 2 – “Basic Rhythms” of Piano Adventures Primer we soon come across minims (half notes). Beforehand, earlier in the lesson or perhaps during a previous lesson, we learn the rhyme Slowly Slowly.

Slowly Slowly is a sweet two verse rhyme with a tempo change. The first verse concerns a very slow snail that slowly slowly very slowly creeps up the garden rail. The second verse is about a faster little mouse that runs around our little house!

I start by asking the children if they can think of any slow animals. We might go through a few before thinking of a snail. We make snail shapes with our hands by tucking our thumb between fingers 2 and 3. We move our hand-snail slowly up our arm as we perform the rhyme. Sometimes I make my snail go onto my face and we giggle because it’s so slimy and yukky! Next we talk about faster animals, clues are often needed for this one! We make a mouse’s nose with our fingers and make them dash about our bodies!

The challenge for these rhymes is getting a sense of proportion between the fast and the slow verses. The children think it’s really fun to perform the slow verse really slowly and then the fast verse super fast. What we want is the fast verse to be twice the tempo of the slow verse.

I also have some gorgeous finger puppets from Wise Owl Toys. The children love to use these instead of their hands. They can have one on each hand and tap the pulse of the rhyme on their knee with the correct puppet. We can tap the pulse on the piano lid, on their heads, on the floor – anywhere they like! We can use these soft toys to jump along the keys of the piano from low to high, or high to low, with the correct tempo.

One of my more creative 5 year old students spent ages making up his own games with the keys and these little puppets. He had a race from one end of the keyboard to the other! The mouse could go fast but the snail had to go slow (he was the mouse!!) He also played hide and seek with them. He “hid” one puppet on a key and I had to “find” it with the other one, again using the correct tempo. Of course the puppets are quite big so we had to pretend they were hidden. His favourite part was when I’d almost “found” him but hopped straight past using the black keys. Hilarious for a 5 year old!

Of course, don’t forget the children can be the animals themselves! Get them down from the bench and walking, crawling, running around the room. Allow them to feel the freedom to start with, but eventually the fast verse should be twice the tempo of the slow one.

How does this relate to Piano Adventures?

At some point you’ll want to drag the children back to the boring old bench and draw them a minim. Now when we explain that a minim is like the snail and the crotchet is like the mouse – they can understand that minims are slower or last longer than crotchets. In fact they last for exactly twice as long!

They draw a row of crotchets (I like Nancy Faber’s little song – It’s got a head and a stem and it’s all coloured in, that’s what makes a crotchet!) and they can tap the mouse on each crotchet. Then of course a row of minims (It’s got a head and a stem but it’s not coloured in, that’s what makes a minim!) and the snail can tap along that. We can make a pattern of crotchets and minims (ta ta ta-a or ta-a ta ta) and use both animals to tap their relevant note.

I explain that we say ta for crotchets and we say ta-a for minims. We then spend some time immersing in the terminology by banging on the piano lid. We start with crotchets. Ta ta ta ta…. On the eighth crotchet I call minims and they must start tapping minims ta-a ta-a… Four of those and we’re back to crotchets. We can do this over and over until they get bored, I’m usually the first! When I tap ta-a I usually show a little pulse on the second beat “a” with my wrist. So it looks like tap bob tap bob. We can repeat this motion then when clapping. I find some children struggle with the clapping motion but find the piano lid achievable.

So when we look at the first piece in Piano Adventures that uses minims – The I Like Song – they have a deep understanding of what a minim is! Better than just saying “Look! That counts for two!”

Once they have confidently learnt Slowly Slowly and Cobbler Cobbler I will introduce them to my Solfa Challenge which starts at Level 1.